Enhance Your Brand Identity by Sending Emails via Gmail with Your Own Domain Using AWS SES
Boost your professional image by sending emails using your own domain with Gmail. A viable alternative to Google Workspace, particularly for budding startups, is leveraging Amazon Web Services' (AWS) Simple Email Service (SES) along with Gmail. This affordable solution provides comprehensive email capabilities for numerous users.
This guide will show you how to set up and manage your email infrastructure using your own domain, AWS SES, and Gmail, ensuring your emails land in inboxes rather than spam folders. By adopting AWS SES, you can manage multiple users while keeping costs low. Let's get your professional email communication up and running.
1. Obtaining a Custom Domain:
Get a domain, such as "yourdomain.com," from a trusted domain registrar like Google Domains because:
-
It provides free privacy protection, securing your personal information from public WHOIS databases.
-
It offers pre-configured MX (Mail Exchanger) records for your domain, making the setup process seamless.
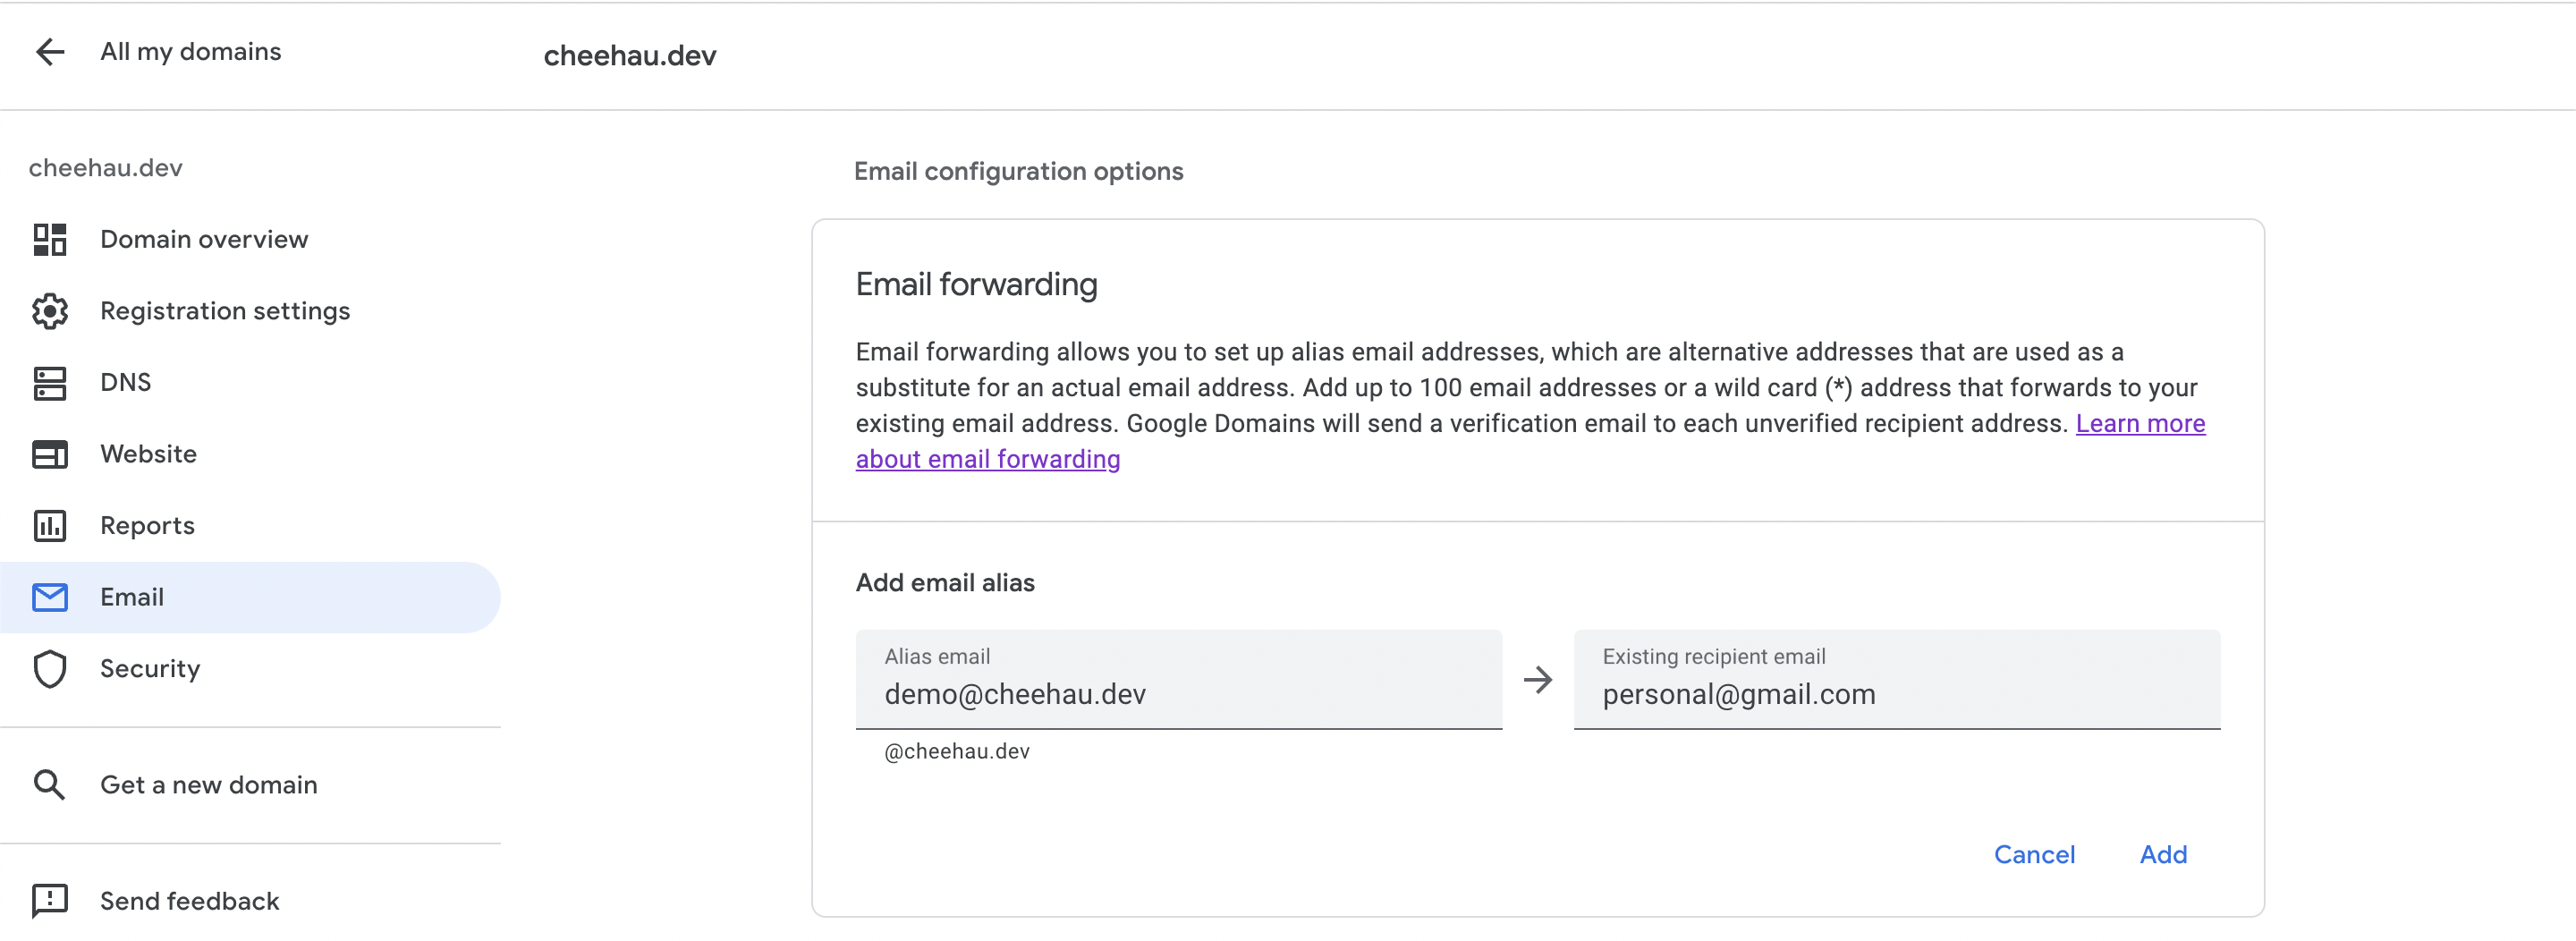
After acquiring your domain, configure email forwarding to start receiving emails at your domain email addresses.
2. Verify Your Domain in AWS SES:
Start by creating an AWS account. Then:
- Go to the AWS Management Console and access the AWS SES module.
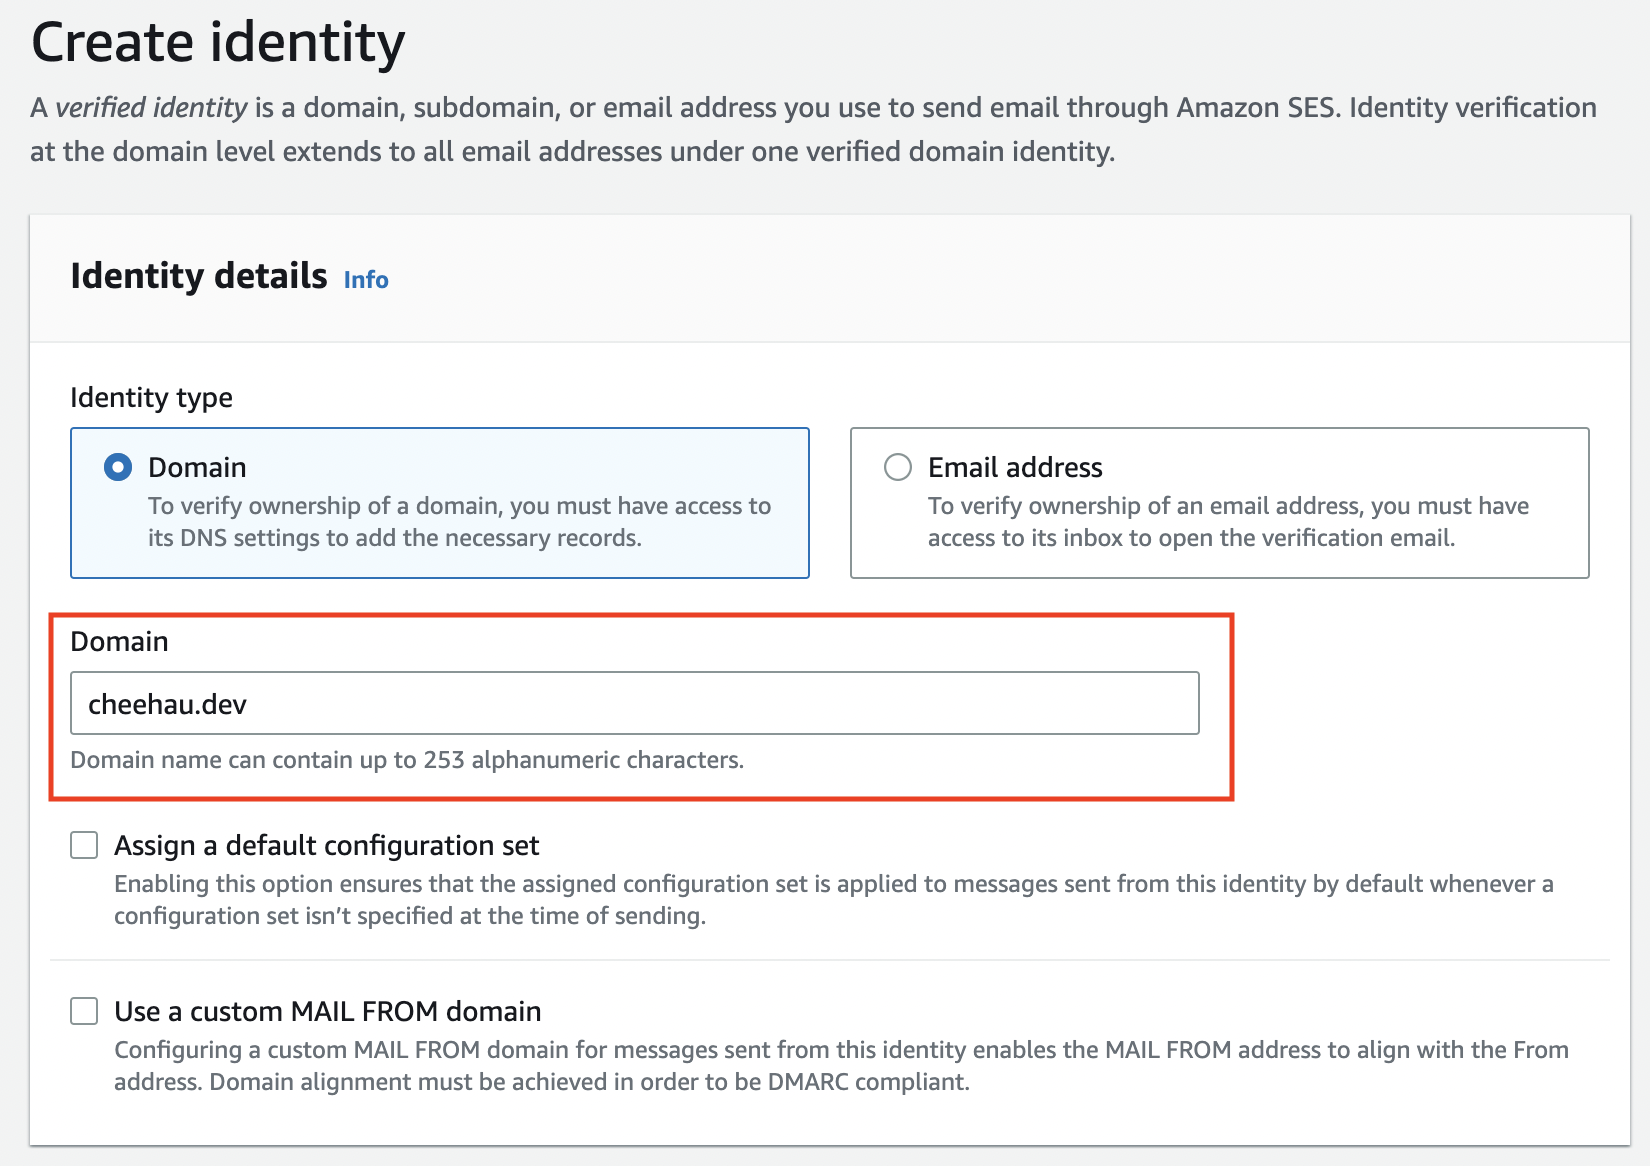
- Navigate to "Verified identities" and select "Identity type: Domain" to verify your domain.
- Enter your domain name and click "Verify This Domain."
- AWS SES will provide you with DNS CNAME records needed for your domain settings.
3. DNS Record Configuration:
Configure the DNS records for your domain. If you're using Google Domains:
- Access your domain management console and locate the DNS settings.
- Add the three CNAME records provided by AWS SES
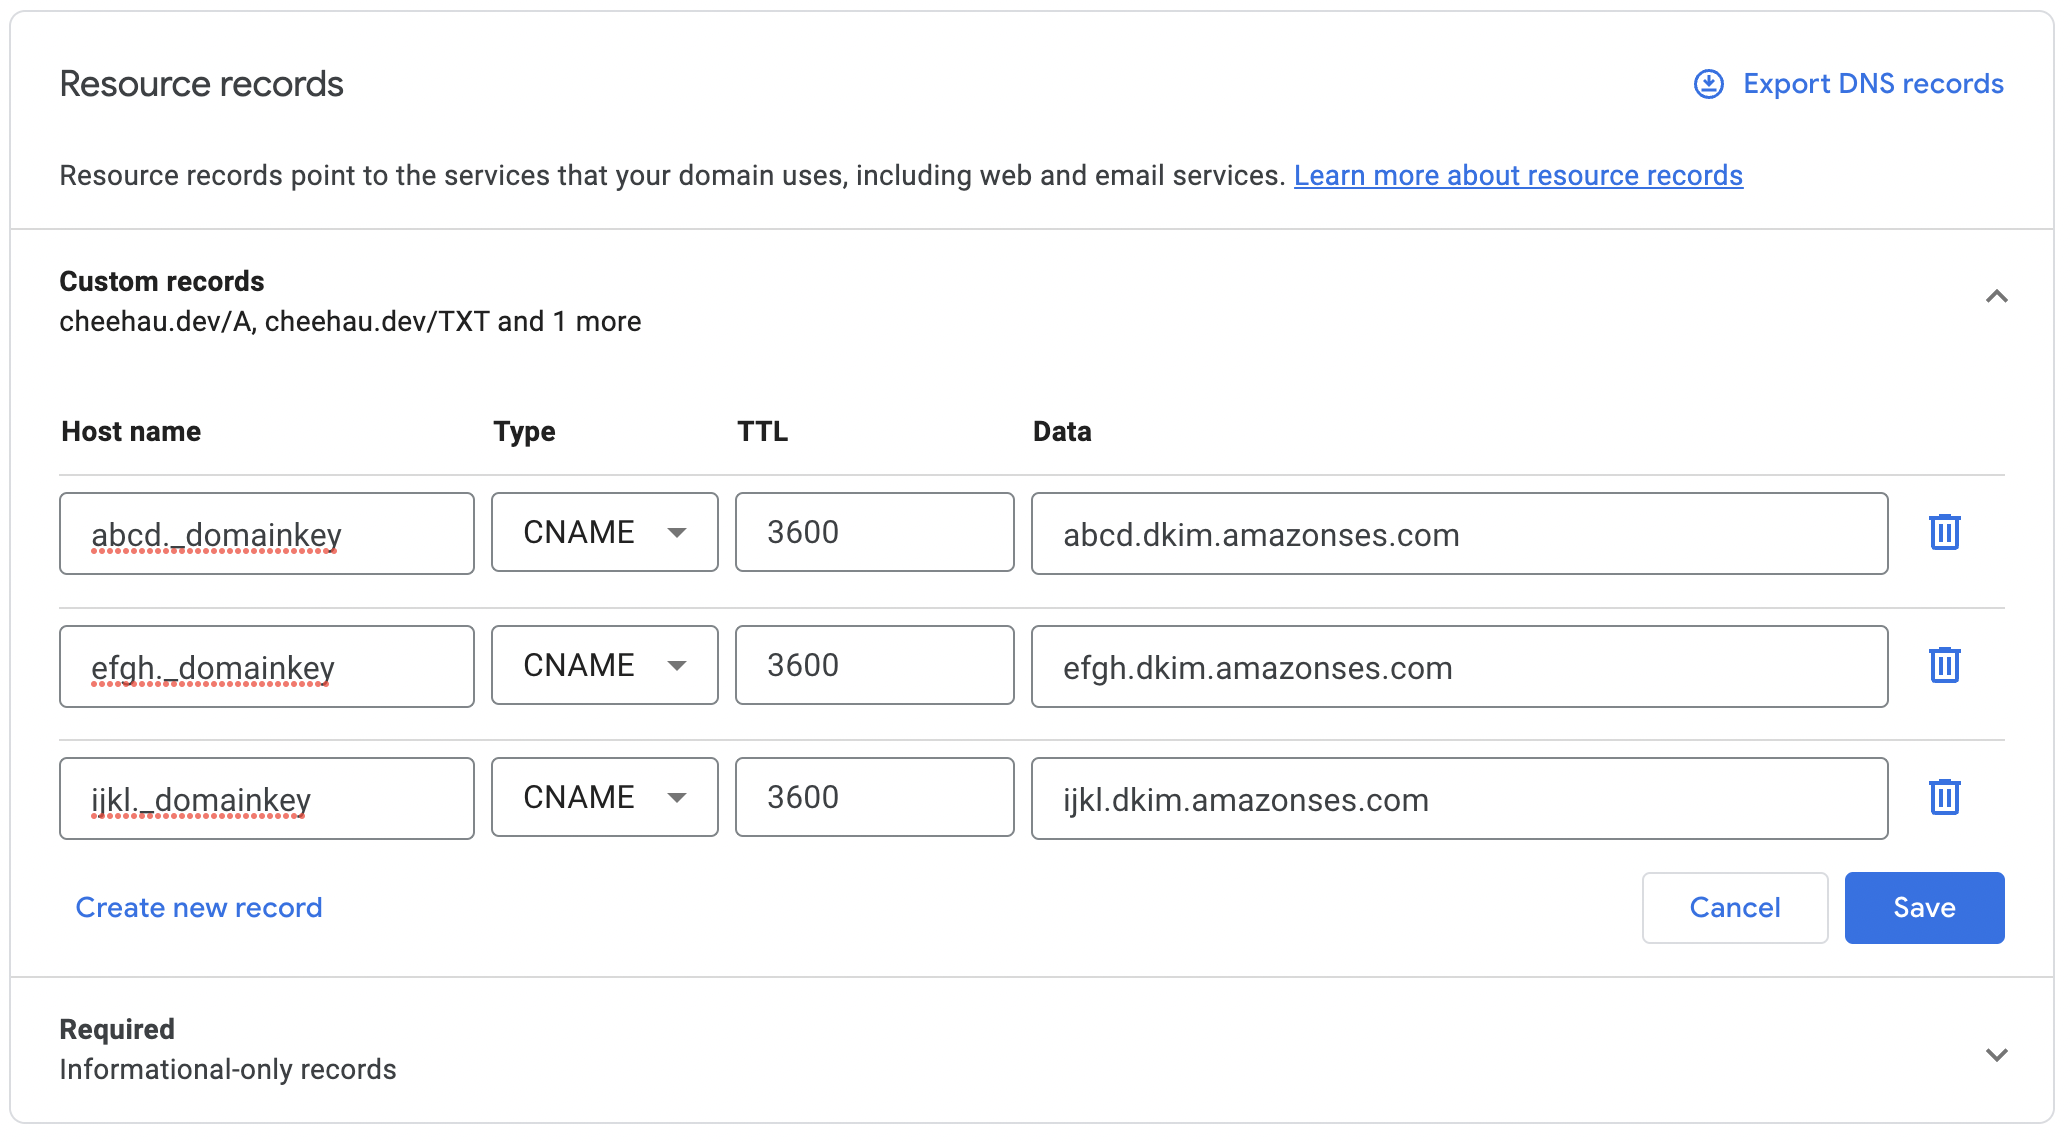
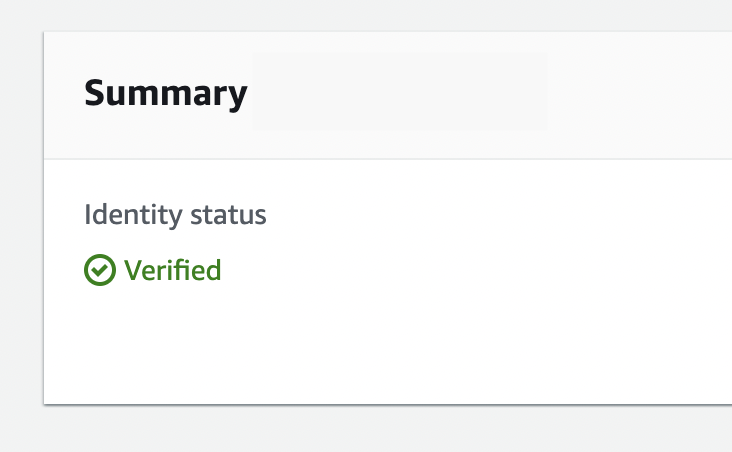
The configuration and propagation of DNS records enable AWS SES to verify your domain and proceed with the email setup process.
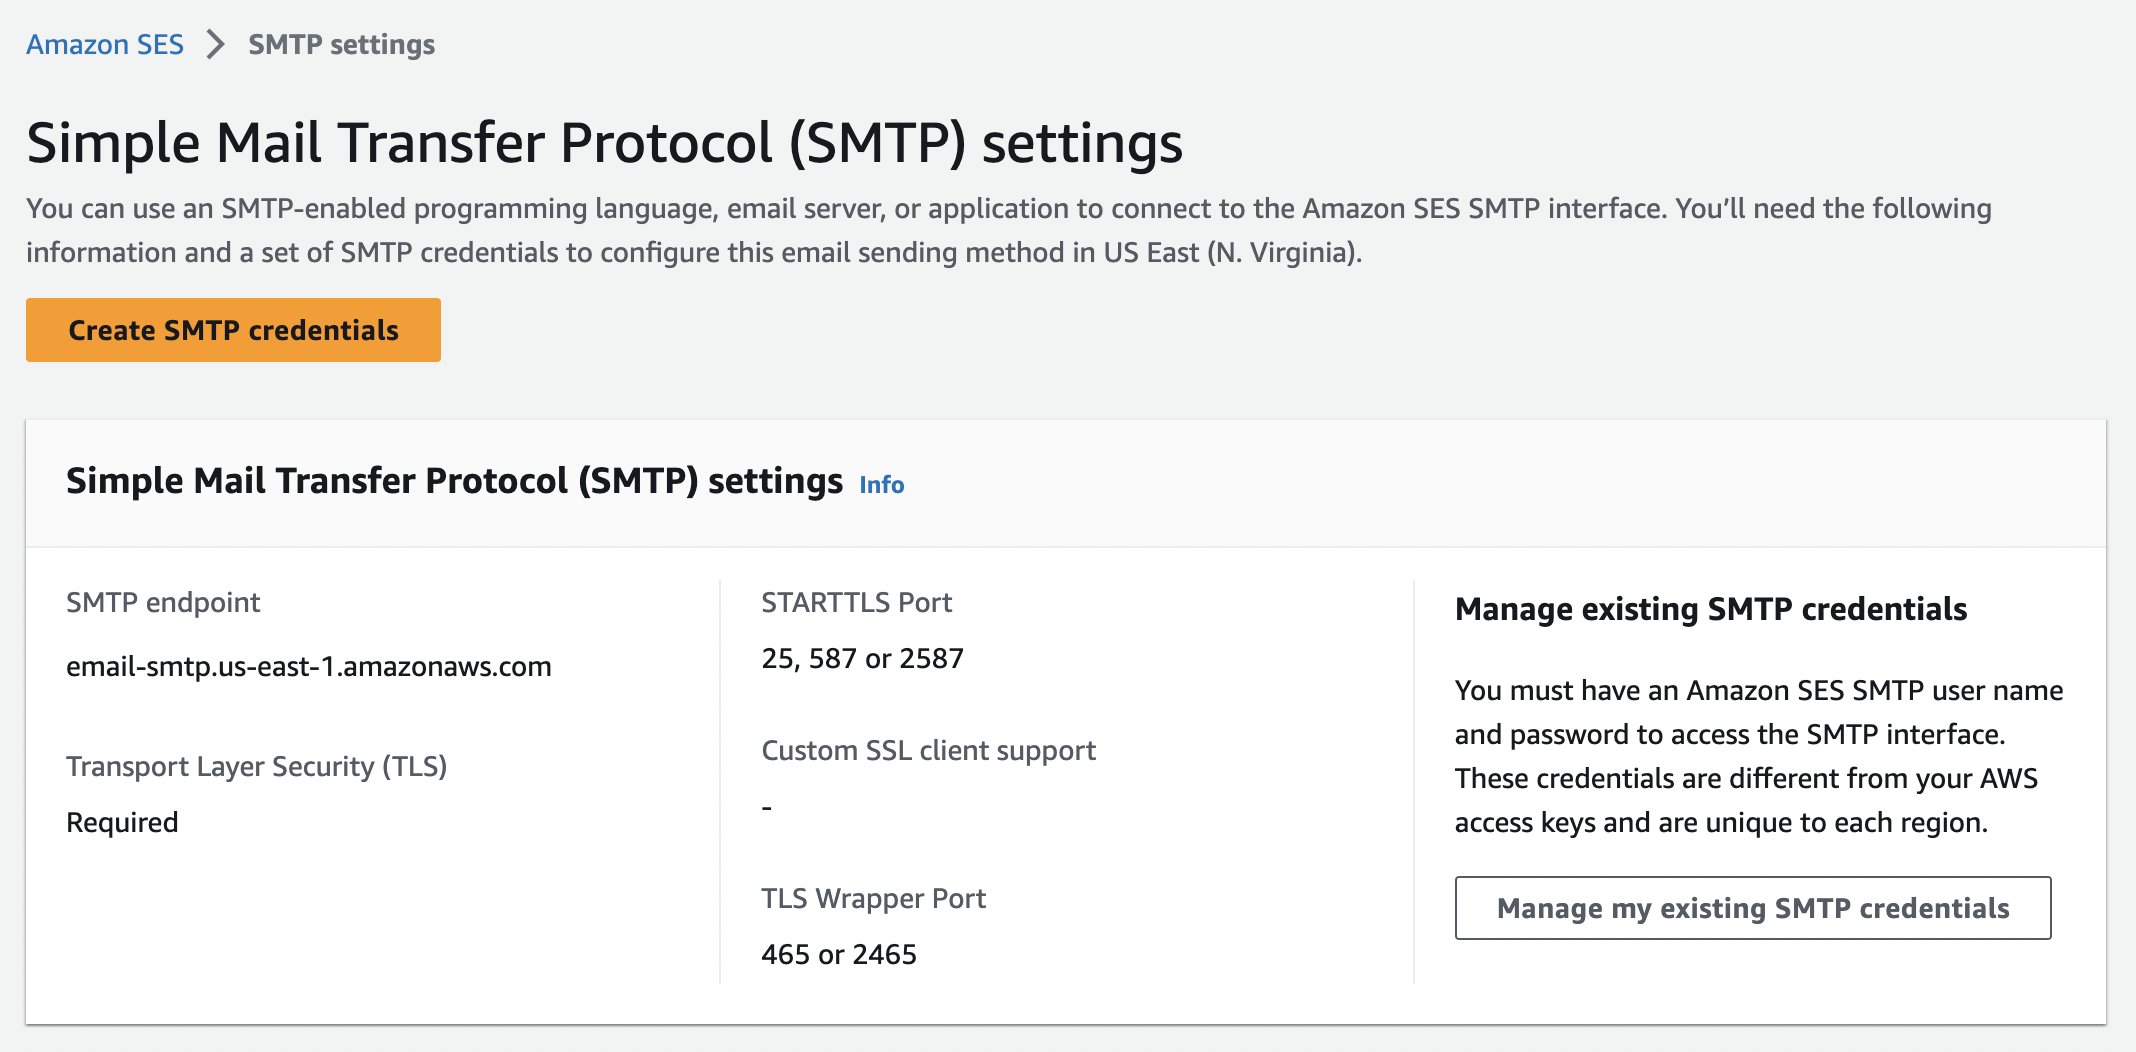
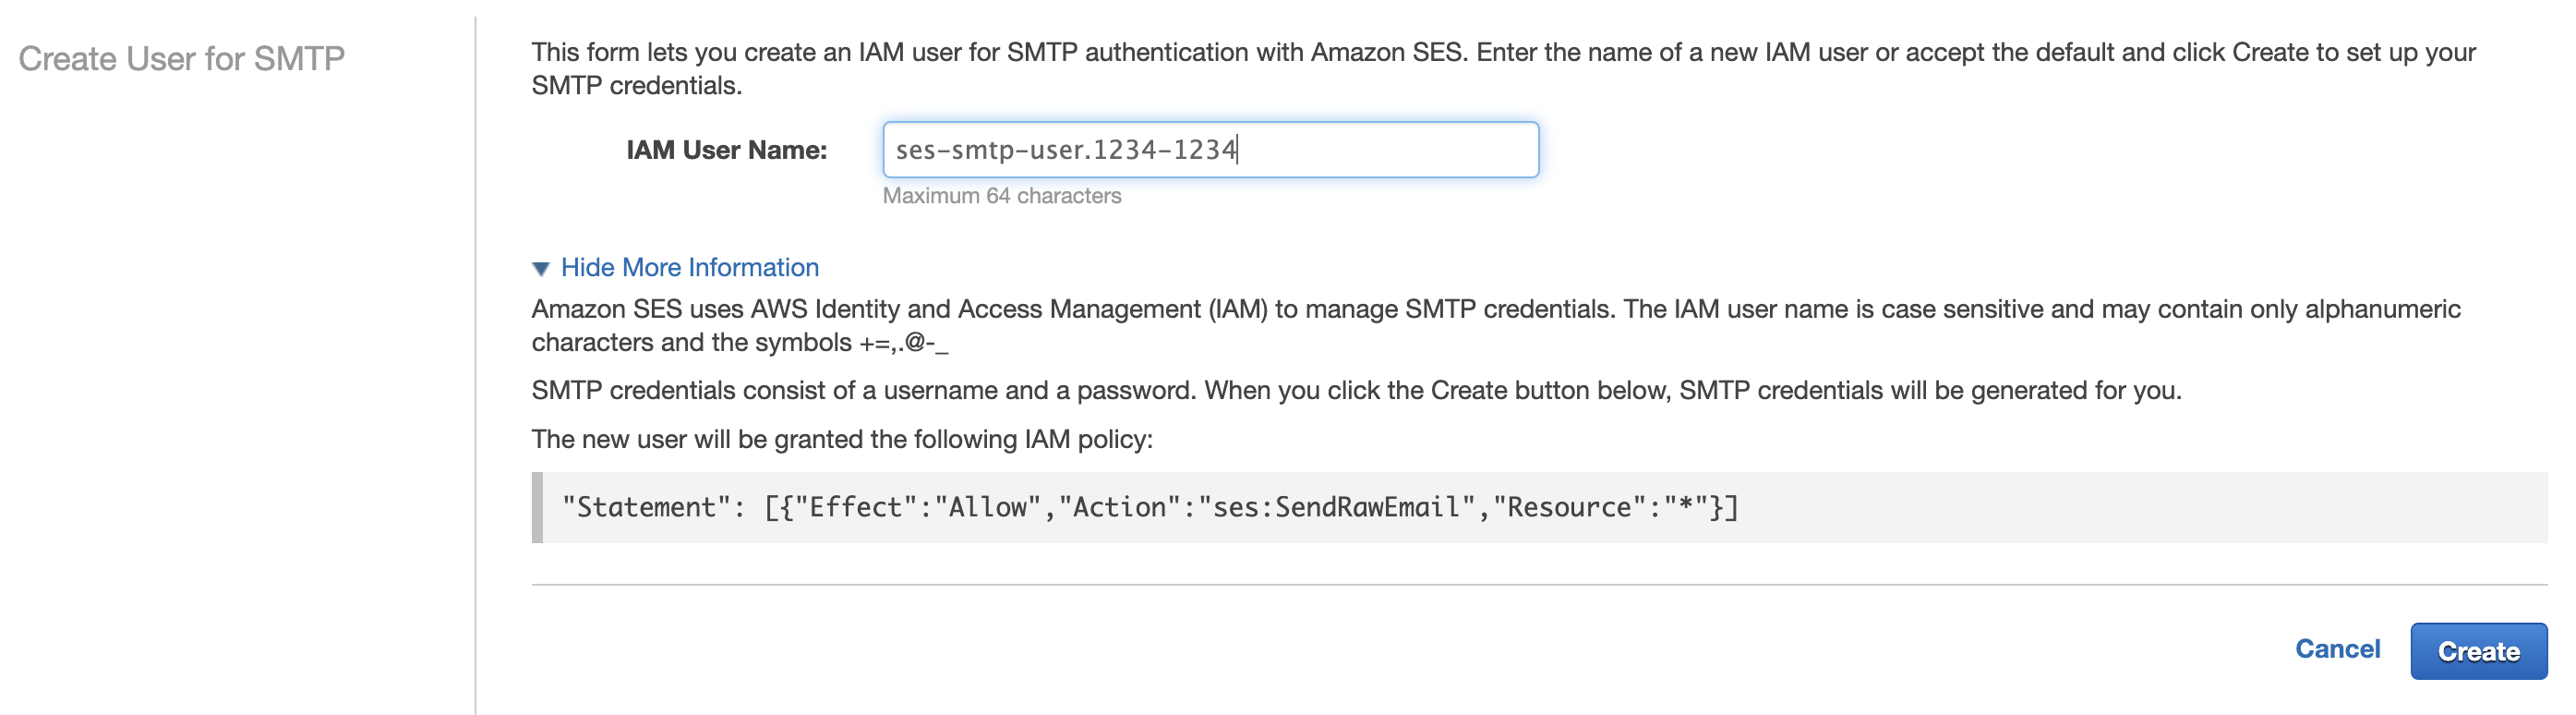
4. SMTP Credential Creation:
Create an SMTP credential in the AWS SES console, noting the generated SMTP username and password for later use.
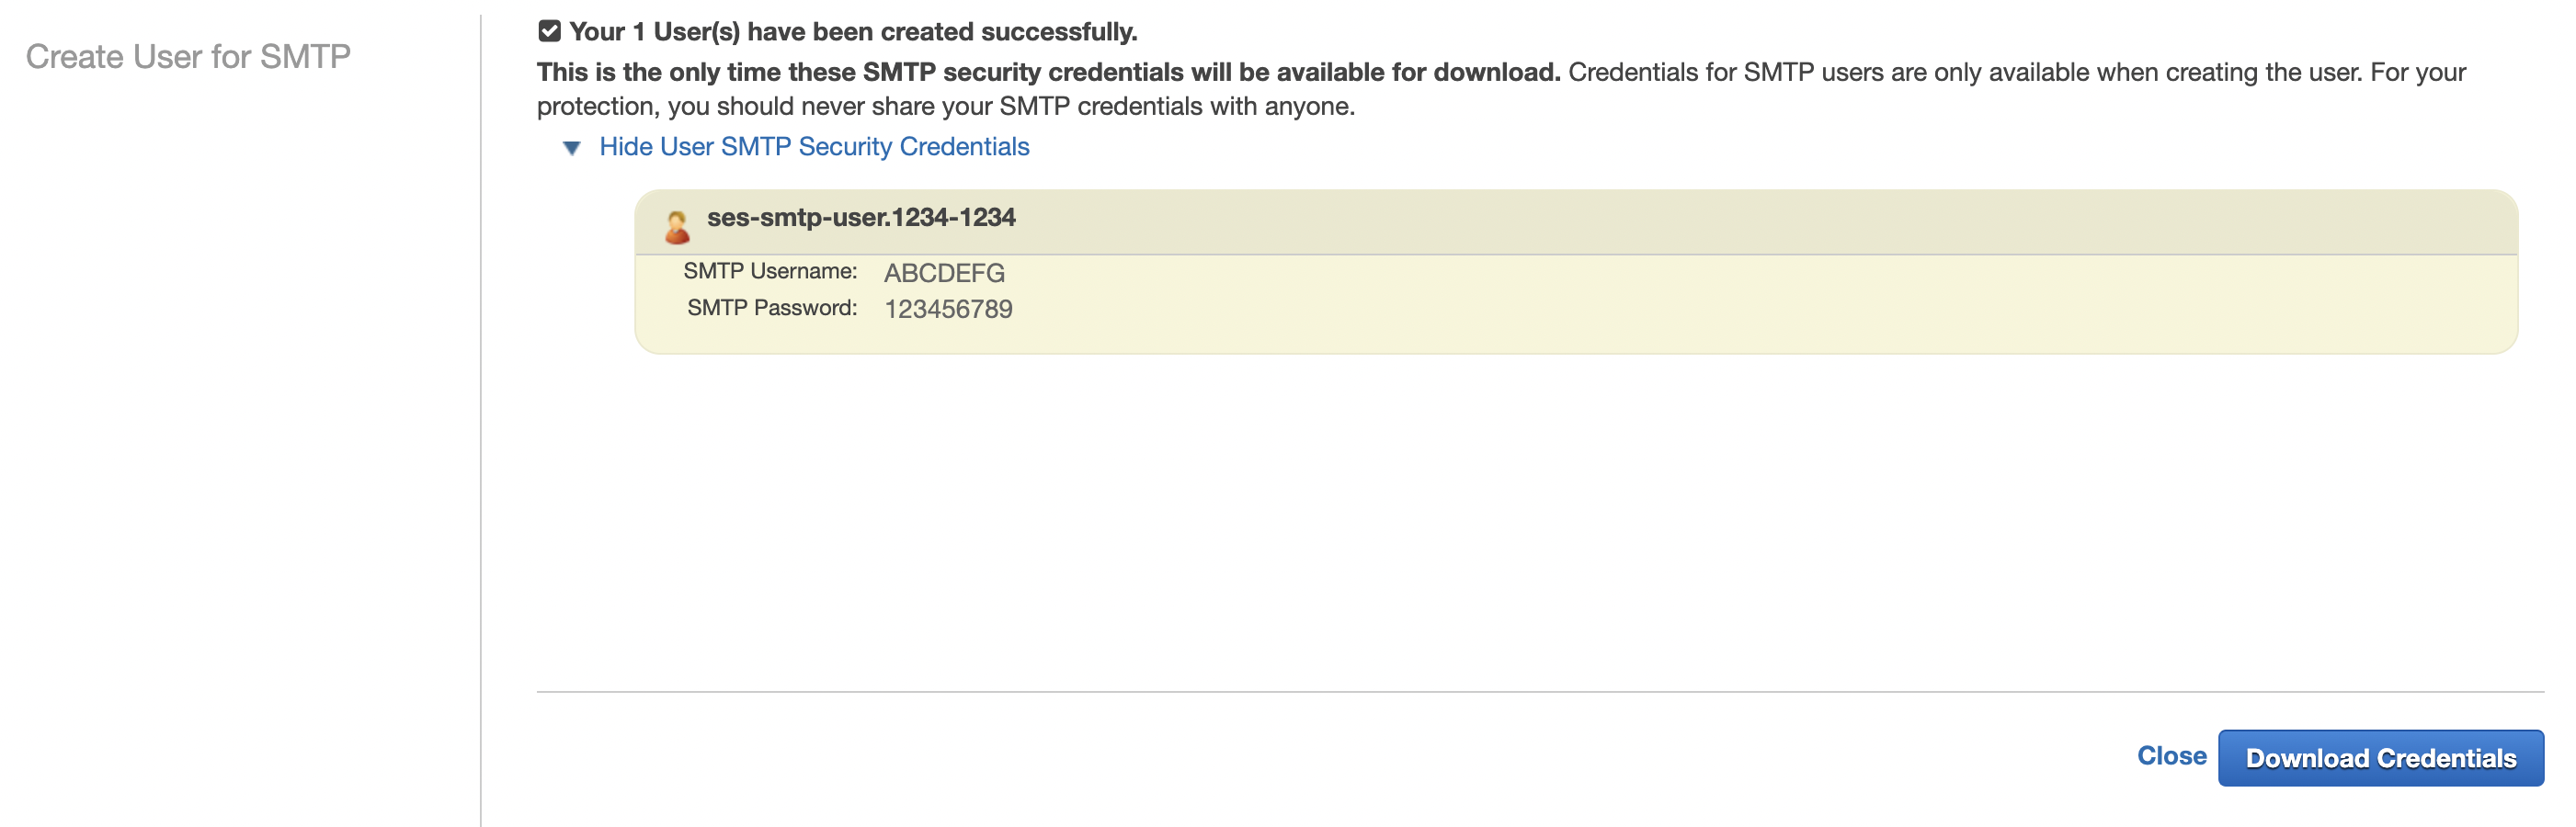
With your domain verified and the SMTP credential created, you are now ready to proceed with integrating Gmail to send emails using your own domain.
5. Setting up a new SMTP in Gmail:
Configure Gmail to send emails using your domain:
- Open your Gmail account and go to Settings (click on the gear icon in the top right corner).
- In the Settings menu, navigate to the Accounts and Import tab.
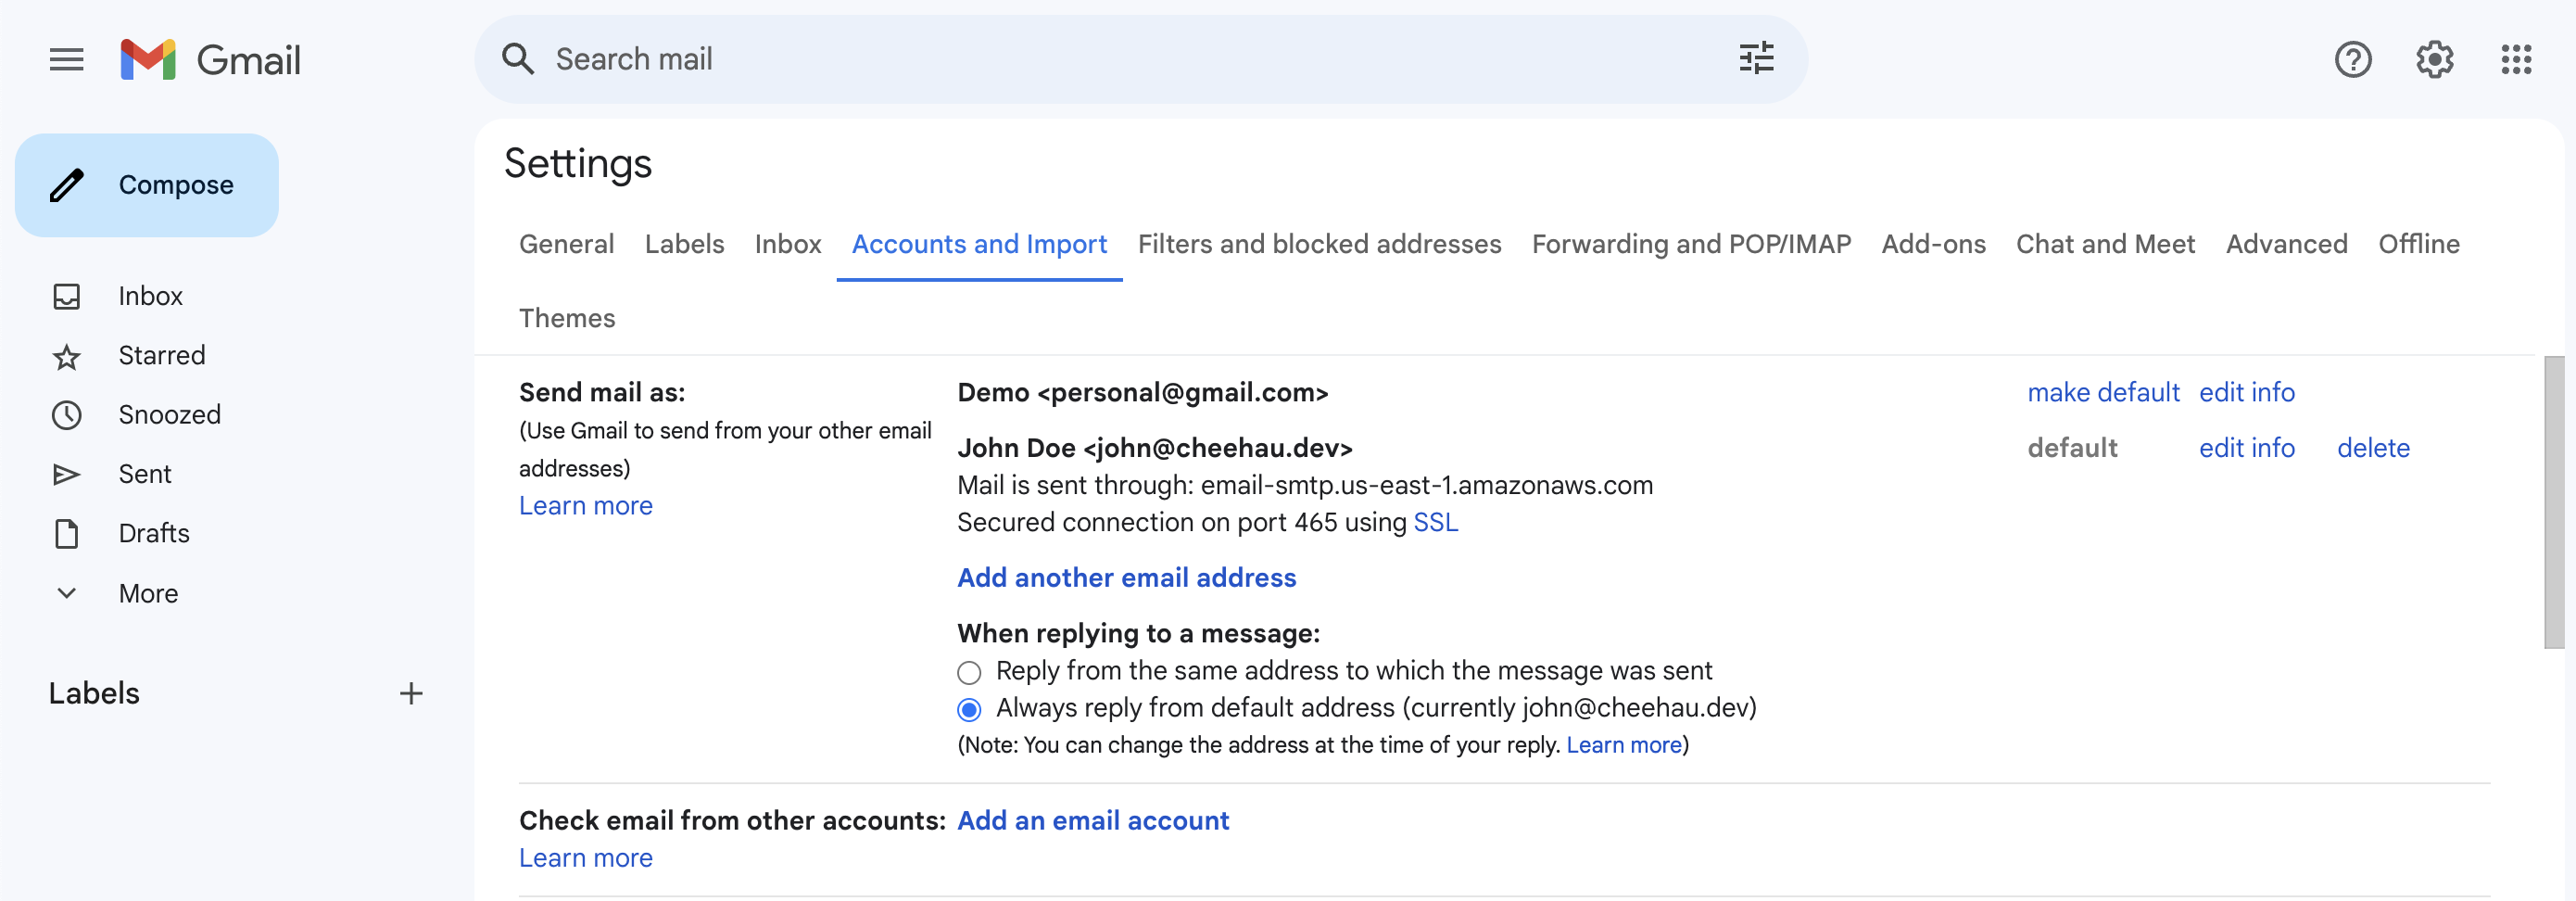
- Under the Send mail as section, click on Add another email address.
- A new window will appear. Enter your name and the email address you want to send from. Note that the email address domain must match the one verified at AWS SES to ensure successful email delivery.
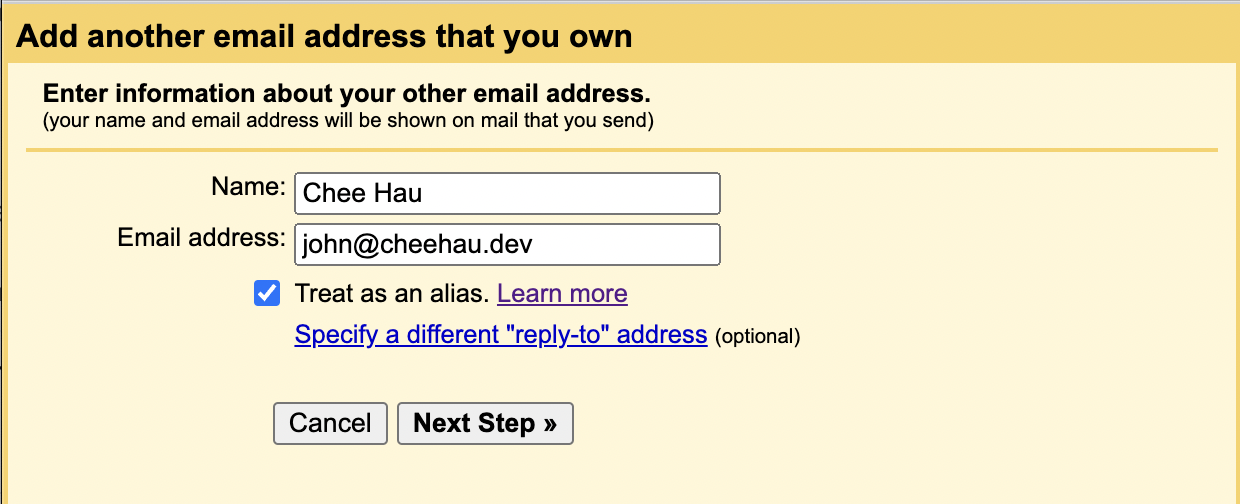
- Click on Next Step.
- Fill in the SMTP server details from AWS:
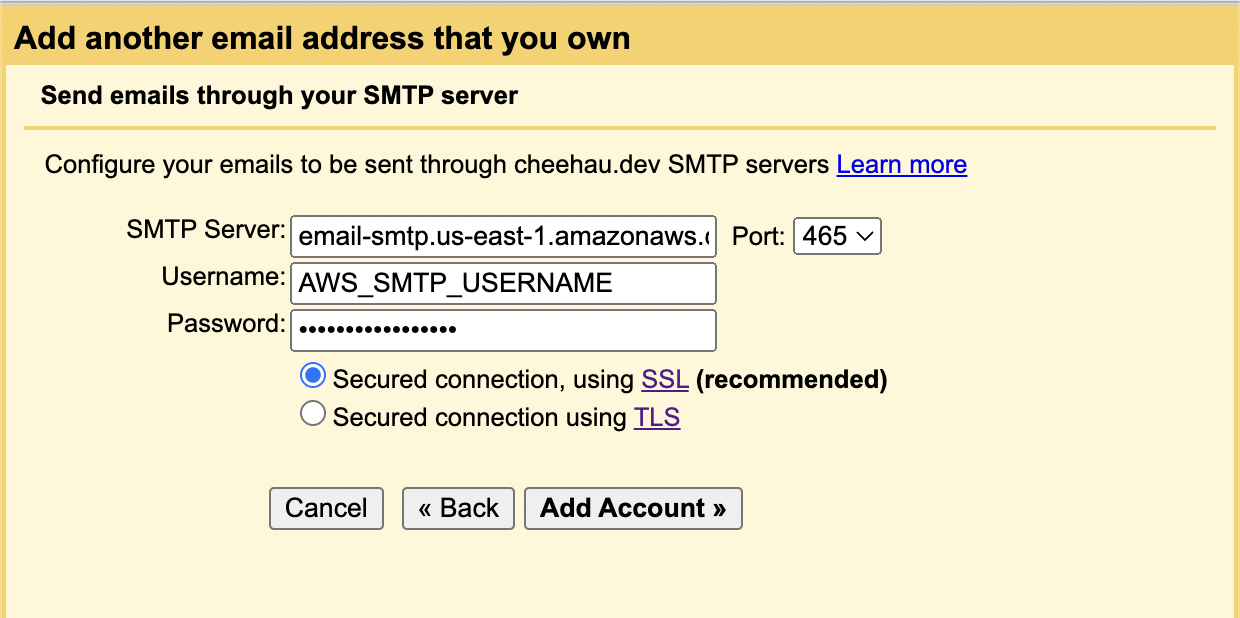
- Click on Add Account.
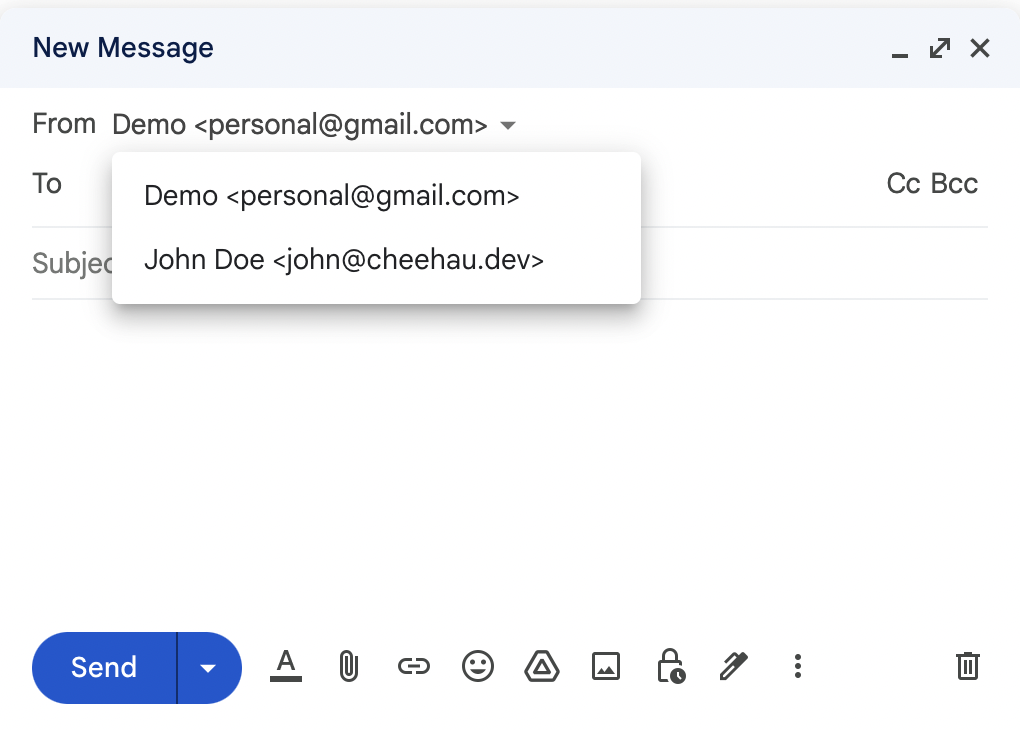
Gmail will send a verification email to the email address you entered. Check your inbox, find the verification email, and follow the instructions to verify the ownership of the email address. Once verified, you can start sending emails from Gmail using your own domain.
5. Enhance Email Deliverability with SPF, DKIM, and DMARC:
To ensure optimal email deliverability and avoid your emails ending up in recipients' junk mail folders, it's crucial to configure SPF, DKIM, and DMARC. These authentication protocols work together to verify email authenticity. Follow these steps to configure them:
SPF (Sender Policy Framework):
- Access your DNS management console, such as Google Domains.
- Locate the DNS settings for your domain.
- Add a new TXT record with the following details:
- Name/Host/Alias: Leave it blank or enter "@" to represent your root domain.
- TTL: 3600 or default value.
- Data/Value:
"v=spf1 include:amazonses.com ~all"
To verify your SPF setup, you can use tools like MXToolbox SPF Analyzer. Enter your domain name, and the analyzer will validate your SPF record configuration.
DKIM (DomainKeys Identified Mail):
You have already configured this in Step 3.
DMARC (Domain-based Message Authentication, Reporting, and Conformance):
- Access your DNS management console.
- Add a new TXT record with the following details:
- Name/Host/Alias:
_dmarc - TTL: 3600 or default value.
- Data/Value:
"v=DMARC1; p=reject; pct=100; rua=mailto:your@email.com; ruf=mailto:your@email.com; fo=1; adkim=s; aspf=s; sp=reject;"
- Name/Host/Alias:
To verify your DMARC setup, you can use tools like MXToolbox DMARC Analyzer. Enter your domain name, and the analyzer will validate your DMARC record configuration.
Replace your@email.com with the email address where you want to receive DMARC reports.
By configuring SPF, DKIM, and DMARC, you establish a robust authentication framework for your domain, significantly enhancing email trustworthiness, reducing the likelihood of spam classification, and improving overall deliverability.
Summary:
This article outlines the setup process for a professional email system using your own domain with Gmail and AWS SES. In summary:
- Register your domain with a trusted registrar such as Google Domains for easy email forwarding setup.
- Verify your domain in AWS SES and create an SMTP credential.
- Improve email deliverability and avoid spam with SPF, DKIM, and DMARC. Tools like MXToolbox can verify your configuration.
With these steps, you're ready to enjoy professional, reliable email communication with your own domain. Regular monitoring and optimizing email performance are crucial for efficient communication. With Gmail and AWS SES, you're on your way to reliable, professional email communication using your own domain.
Happy emailing!